
Lately I’ve been playing Castle Crashers on XBLA (Xbox Live Arcade). Castle Crashers is a console video game independently developed by The Behemoth, the same team behind Alien Hominid. Believe it or not, Castle Crashers was original made using Flash, then moved over to XNA, X-Box Live’s game creator service.
Feeling inspired, I decided to revisit Flash. For today’s Flash tutorial, I’m going to show you how to control a character’s walking animation with the left and right arrow keys.
1) Create New Flash Document
Probably the easiest step in this tutorial. Start Macromedia Flash, and open a new document. If you’re running Flash CS3, select new file and click on Flash File (Actionscript 2).

2) Create a blank movie clip.
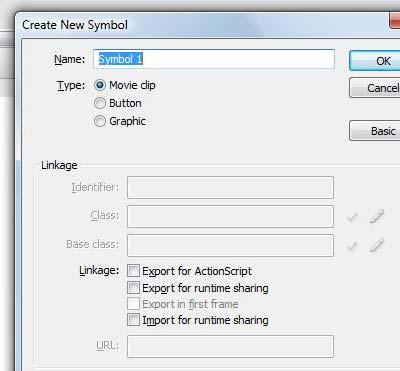
Press Ctrl+F8. This will bring up the Create New Symbol Menu. Fill in a name of your new movie clip. For this tutorial, I am naming mine “Ninja”.
3) Create Your Character
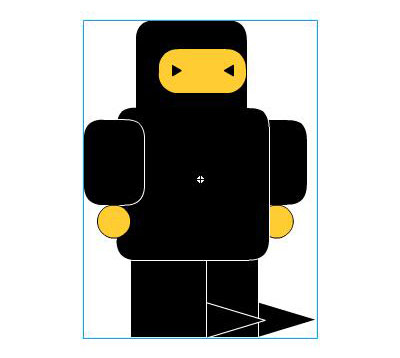
After pressing okay, you will be brought into the movie clip. This is where you will draw your character. I can’t tell you how to draw you character but just draw something cartoonish. For this tutorial, I am drawing a ninja. 🙂

4) Creating New Keyframes
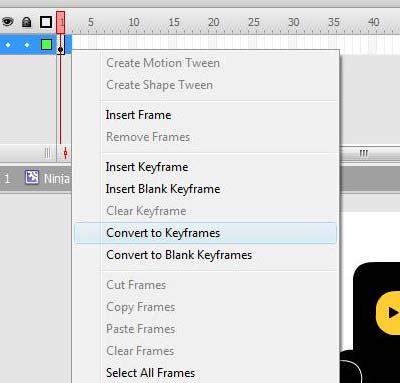
After creating your ideal character, go to frame two of your movie clip. Convert this into a new keyframe. As you can see, the previous frame is duplicated into frame 2 automatically.
5) Creating a new Layer, and Blank Keyframes
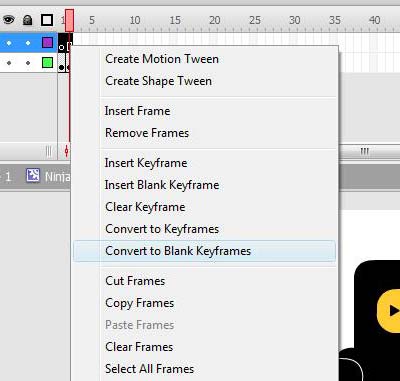
Now it’s time to create a new layer. Click on the create layer button in the flash timeline. Hopefully, the new layer should be on top of layer 1. If not, then move it to the top. Once you create a new layer, select the two frames in layer 2 and convert them into blank keyframes.
6) Stop Codes
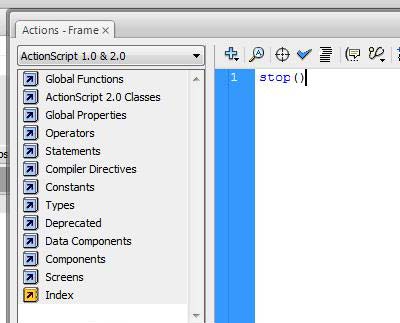
After you have created the two layers, select the first frame of the blank keyframes, and press F9. This will bring up your actionscript screen. Once you done that, insert the following piece of code.
stop()
Close that window, and repeat for the second blank keyframe.
7) Create A “Standing” Clip
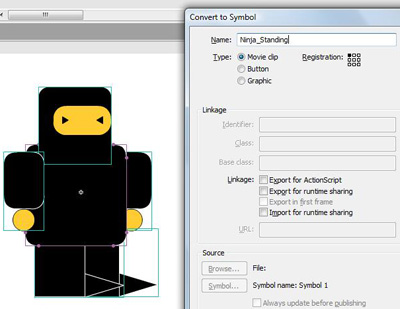
After you have completed the above, select frame 1 of layer 1. Then, select your character (if you created your character with shape groups, then hold the left mouse button and select all of them). After you select your character, press F8. This will bring up the create new symbol screen. Name this new movie clip, “Your character’s name”_stand.
8 ) Creating A “Walking” Clip
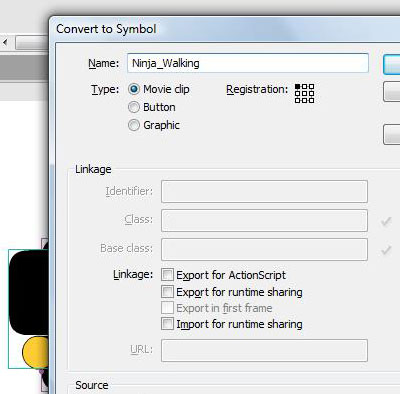
After you have created the standing movie clip, select frame 2 of layer 1. Do the exact same thing you did in step 7, except name your movie clip this time, “You Character’s Name”_Walking.
9) Go into “You Character’s Name”_Walking and animate it!
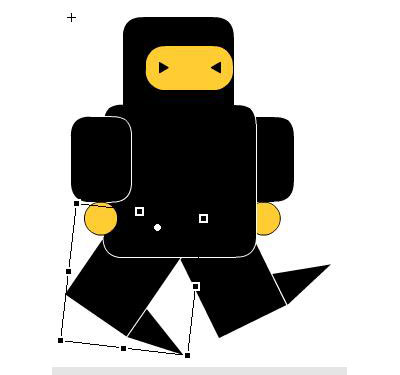
Double click on the “You Character’s Name”_Walking movie clip. Once you are in the ““You Character’s Name”_Walking movie clip, select your character, right click on them, and select free transform. Free transform allows you to rotate various parts of your character or move them. This is the part where you will animate your walking animation. I can’t tell you how to animate your character since everyone has a different animation style, but for this tutorial, I created six key frames and moved my character’s legs slightly every time.
10) Exit To Scene 1
Once you’re happy with the animation, exit your “You Character’s Name”_Walking movie clip screen, and exit your character’s movie clip screen. Oh yeah! Make sure you fill out your character’s instance name after you exit to scene 1, otherwise, it will cause a whole bunch of errors for the last step.
11) Coding
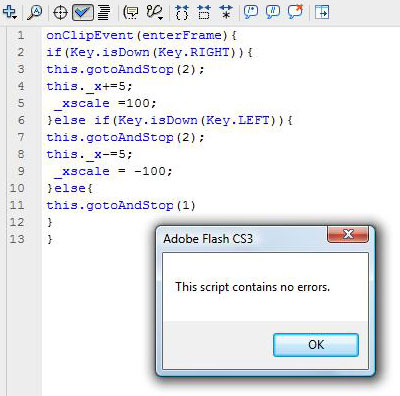
Time for the last step! Woot! Select the movie clip and press F9. Now enter the following code…
onClipEvent(enterFrame){
if(Key.isDown(Key.RIGHT)){
this.gotoAndStop(2);
this._x+=5;
_xscale =100;
}else if(Key.isDown(Key.LEFT)){
this.gotoAndStop(2);
this._x-=5;
_xscale = -100;
}else{
this.gotoAndStop(1)
}
}
12) Test!
Press Ctrl+Enter to see your masterpiece in action! Press the left and right arrow keys to animate your character!
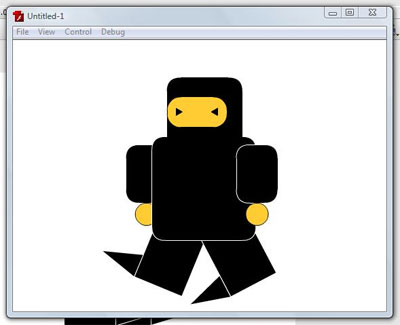
Enjoy your newly created Flash ninja! 🙂
OK OK, if you had problem with the above tutorial, you can check out my FLA (source code) file, or simply try the SWF file. Download both the files here.